Step by Step Guide for Generating CSR and Installing SSL Certificate on Mac OS X EI Capitan
This guide will explain the process of generating the CSR and installing the SSL Certificate on Mac OS X EI Capitan server quickly without making any mistake or error. Let’s discuss them one by one.
Process 1: CSR Generation on Mac OS X EI Capitan
- From your MAC system, open the Server App (From Finder window, click on Applications under the favorites, and then click on Server App).
- Here, you need to select the MAC server for which you are looking to generate the CSR.

To Generate CSR for the current MAC Server
- Select This Mac – Server Name & click on Continue button
- Then, add the System Admin credentials and click on Allow.
To Generate CSR for another MAC Server
- Select the Other Mac and click on the Continue button.
- Here, you need to add the Host/Name or IP Address of the Server.
- Then, add the System Admin Credentials and click on Allow.
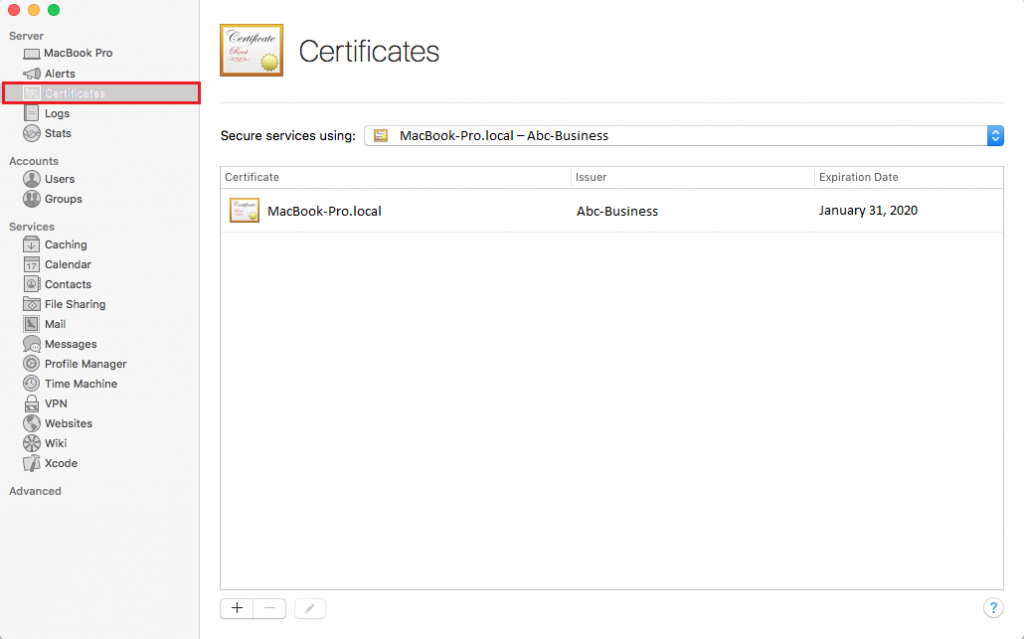
- Now from the Server App, click on Certificates under the Server option.

- Click on + > Get a Trusted Certificate and then click on Next button.
- One by one add the required details.
- Host Name: Your Domain Name
- Contact Email Address: Email address of the Admin or Certificate Issuer
- Company or Organization: Organization Name
- Department: Organization Dept.
- Town or City: City Name
- State or Province: State Name
- Now, click on Next to generate the CSR.
- CSR information displayed on your screen.
- Click on the Save button and give a preferable path to save the CSR file.
- Hit the Finish button.
Note: Before you start the SSL installation process, make sure to complete the SSL Certificate Issuance process and verify all the SSL certificate files provided your Certificate Authority. Save these files into a specific location.
Process 2: Install SSL Certificate on Mac OS X El Capitan
Here, we will first install the intermediate certificate, then SSL certificate and finally we will assign the SSL to the services.
Install Intermediate Certificate on Mac OS X El Capitan
- From the Finder window, click on Applications > Utilities > Keychain Access (double click)
- In the Keychain Access window, click on System under the Keychains.
- Open the Location where you have saved the Intermediate certificate file
- Now, drag the file and drop it into the System window
- Add the Administrator Password and click on Modify Keychain, this will authorize the changes.
Install SSL Certificate on MAC OS X EI Capitan
- From the Finder window, click on Applications and double-click on Sever
- Now, from the Server App, you must select a MAC Server
To install the SSL on this server
- Select This Mac – Server name and click on Continue.
- Add the Administrator Account Name and Password and click on the Allow button.
To install the SSL on another server
- Select the Other Mac
- Add the Hostname, or IP address click on the Continue button, then add the Admin Account Name & Password and click the Allow button.
- Now, from the Server App, click on Certificates
- Double click on the pending Certificate which created during the CSR Generation process.
- You can find the “Drag files received from your certificate vendor here” box.
- Now, from the list of SSL Files, drag the SSL Certificate File and drop it that box and click OK button
Assign SSL Certificate to the Service
- From the Server App, click on Certificates under the Server option
- Here, from the Secure services using select Custom.
- Service certificates window will appear, where you need to select the new certificate for each service you wish to assign.
- Once you complete the selection, click on the OK button.
Finally, you have generated the CSR and Installed the SSL Certificate on the MAC OX EI Capitan Server.


